5 Steps to Set Up an Offer on Your Website & Start Selling Fast
Want to sell your first offer but don’t know where to start? Here’s the exact process I used to set mine up in under 3 hours: payments, scheduling, and intake form included.

You’ve probably heard this advice a few times:
"Launch your offer before you feel ready."
But how exactly? It sounds simple, but where do you start?
I added mine to my site in under 3 hours. Here’s exactly how you can do it too.
Step 1: Define Your Offer
Get clear on what you're selling to customers and the value you will provide them.
- What exactly are you selling?
- Clearly articulate your offer in one sentence.
- Example: "60-Minute AI & Strategy Sprint to clarify automation priorities and next steps."
- Who is this for?
- Identify your target audience.
- Example: Solopreneurs and small teams wanting clear steps on integrating AI tools.
- What outcome or deliverable do they get?
- Define the specific deliverables and outcomes clearly.
- Example: actionable roadmap, automation recommendations, written recap.
- Pricing clarity:
- Determine your pricing. Keep it simple and transparent.
- Example: Fixed price (ex: $250 per 60-minute session), or custom?
Step 2: Set Up Scheduling with Calendly (If Needed)
If your offer is time-bound (e.g., arranging a call or appointment for purchase), you'll need a system to schedule it.
- Create a Calendly account:
- Start with a free account or upgrade to paid for direct Stripe payment integration.
- Connect your calendar:
- Link your calendar (Google, iCloud, Outlook) for automated booking.
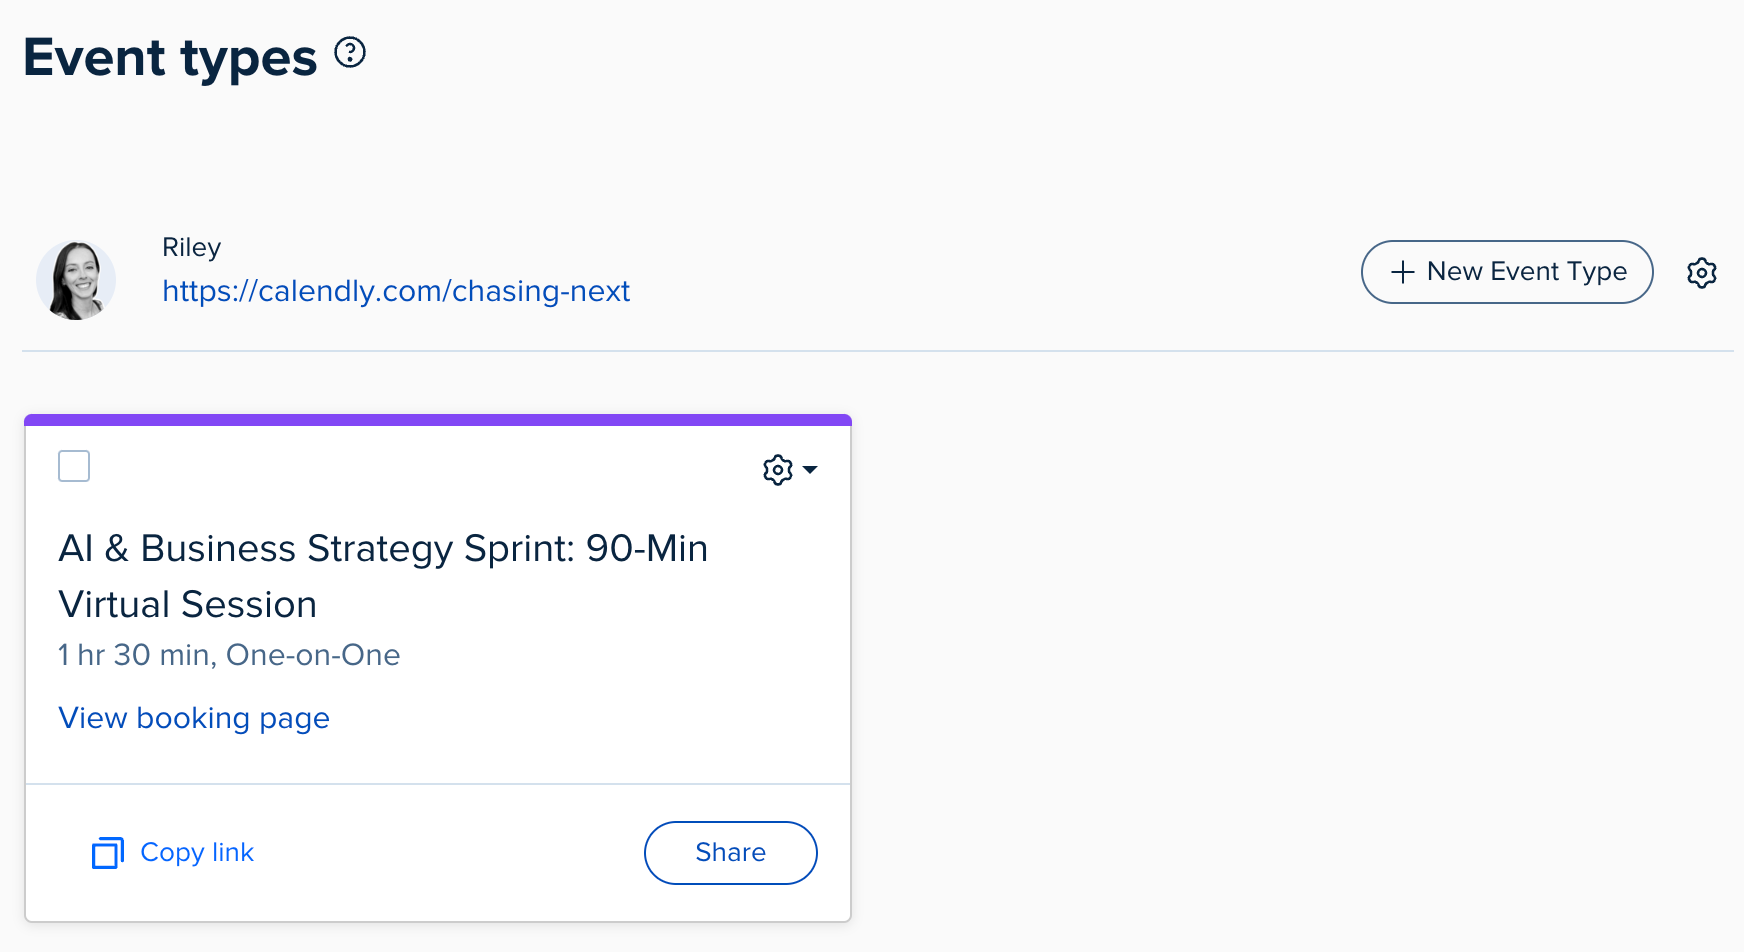
- Create a new event for your offer:
- Navigate to "Event Types" and create a new event type for your specific offer
- You'll select the duration, input information about the service, set & block your availability, etc.
- Navigate to "Event Types" and create a new event type for your specific offer
- Qualifying form setup (optional):
- Add questions to screen and qualify leads
- Example: "What's your goal for our session?", "What challenges are you facing?".
- Keep it short (3-5 questions max).
- Add questions to screen and qualify leads
- Link payment (optional):
- Upgrade to Calendly Standard ($12/month) if you want to automate the payment and booking process by directly integrating Stripe into the userflow.
- Alternative: Integrate Stripe payment into your site first, then send Calendly link manually to the purchaser after their payment is received.
Step 3: Set Up Payments with Stripe
Now the fun part, integrate a payments system to collect $$$ for your services.
- Create a Stripe account:
- Sign-up for a Stripe account (it's free).
- Verify your bank details and business information to finalize your account.
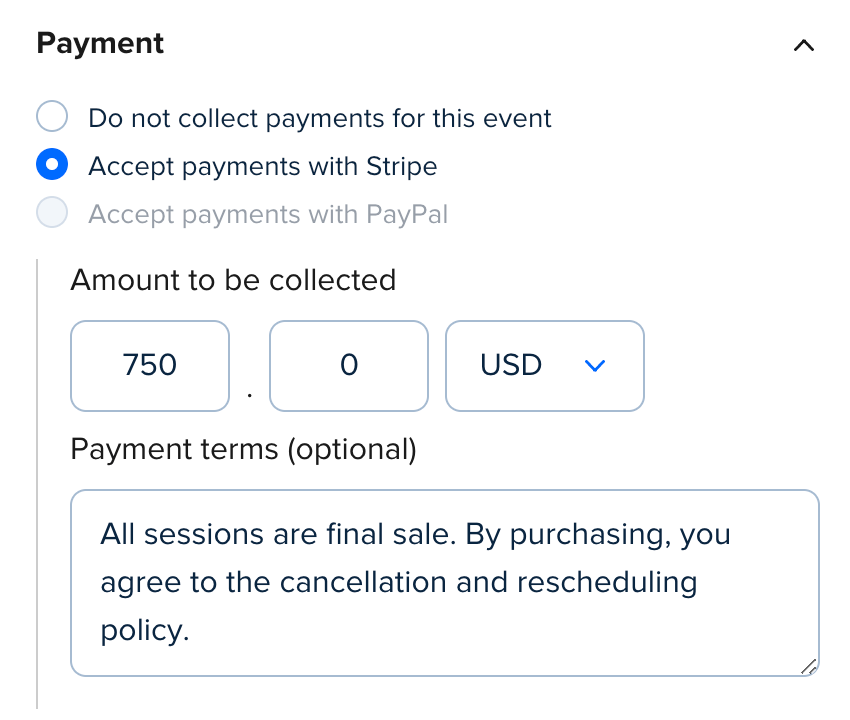
- Integration with Calendly (optional):
- Connect Stripe with Calendly (requires Calendly's paid version).
- Set pricing directly in Calendly, linked to Stripe for seamless checkout.
- Phone number tip (optional):
- Stripe shows your business contact number to customers.
- To keep your personal number private, set up a Google Voice number for business use (this is a paid service).
FYI: Some alternatives to Stripe are Square, Shopify, Paypal, and Gumroad.
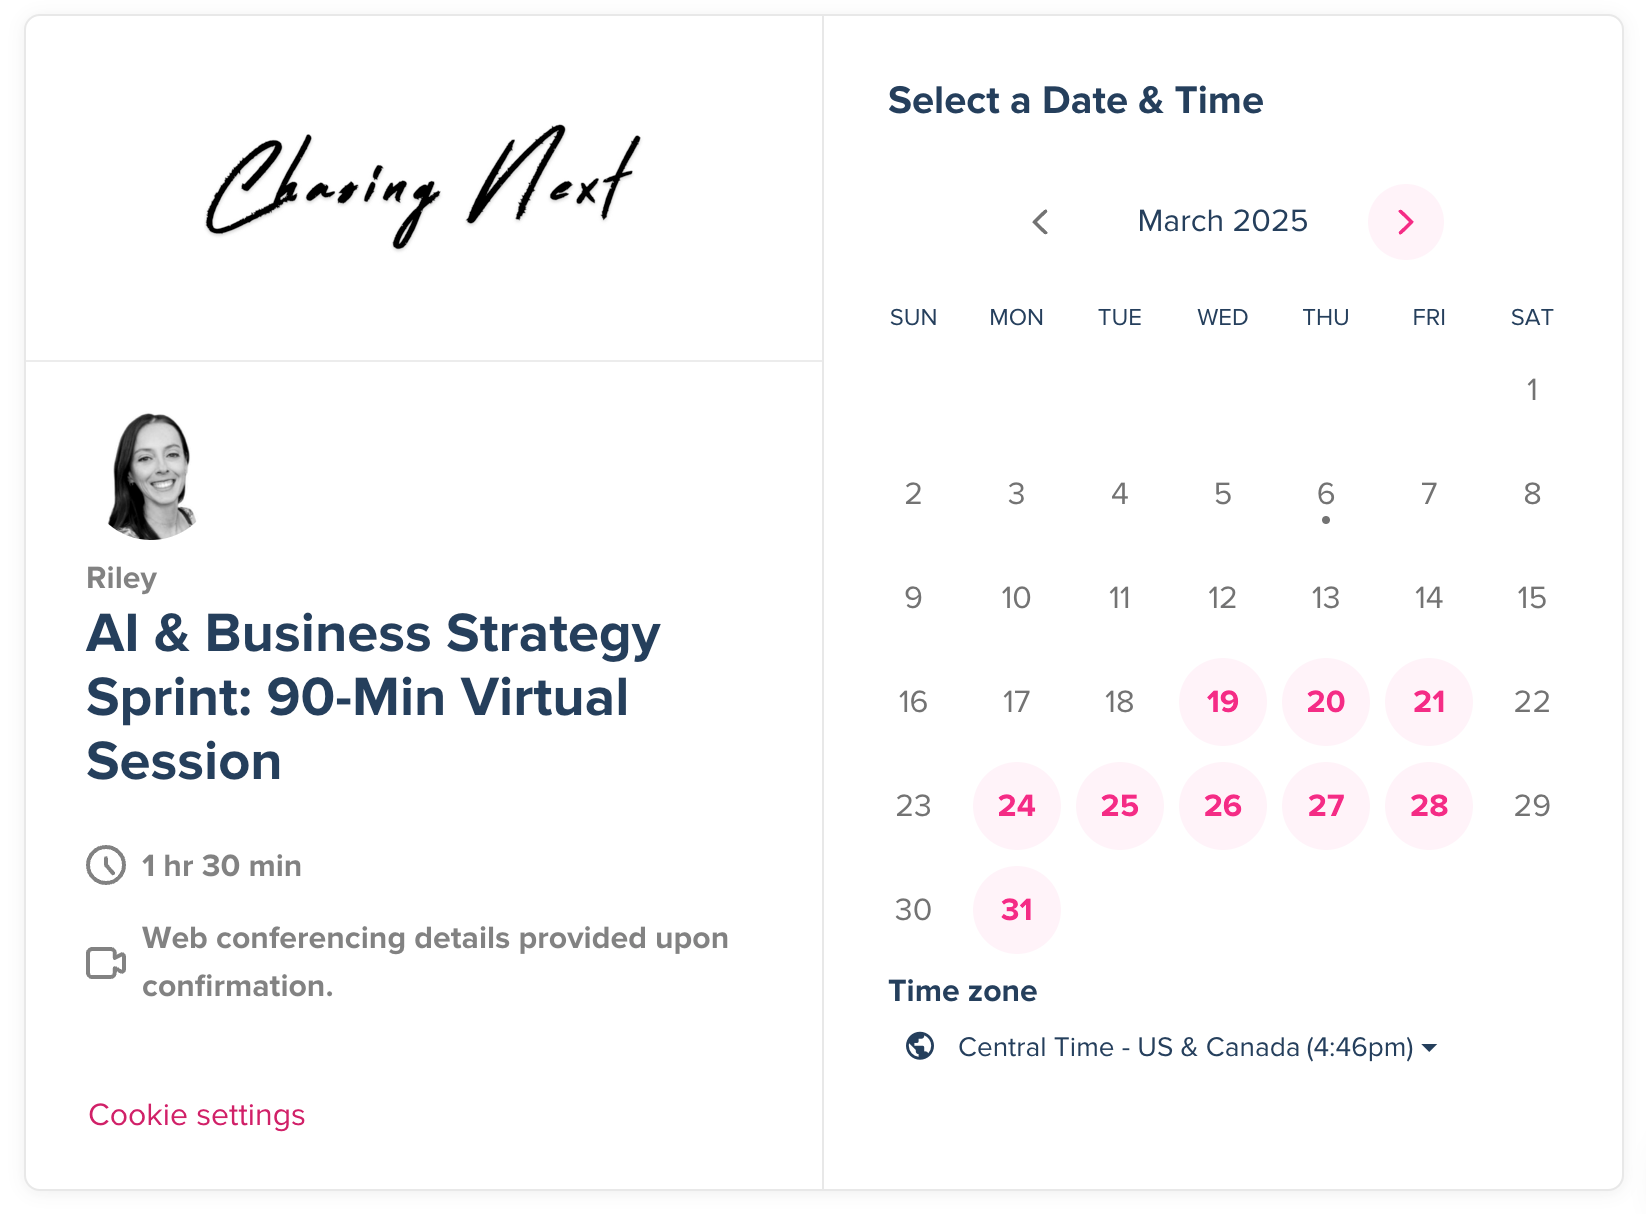
Step 4: Build Your Offer Page
Now that you're getting serious, you'll need somewhere to explain and host your offer. If you already have a personal website, great. If not, it can be easy to create one.
- Already have a website?
- Create a dedicated offer page with clear copy, highlighting exactly what customers get, pricing, and value.
- Integrate your scheduling tool (Calendly) and payment tool (Stripe) directly onto this page by either linking out via URL or embedding your Calendly event code directly onto your offer page.
No website yet? No problem:
- Use a simple, no-code website or newsletter builder (Ghost, Carrd, Softr, Typedream, Webflow, Beehiiv). Feeling overwhelmed? You could even create a shared Google Doc to host your offer.
- Quickly create a clear, single-page site with your offer, payment button, and scheduling embed.
- Critical components for your offer page (keep it simple):
- Who it's for (clearly define the audience)
- What they get (specific deliverables/outcomes)
- Pricing (make it easy to find)
- Clear call-to-action (link your Calendly event or Stripe product directly)
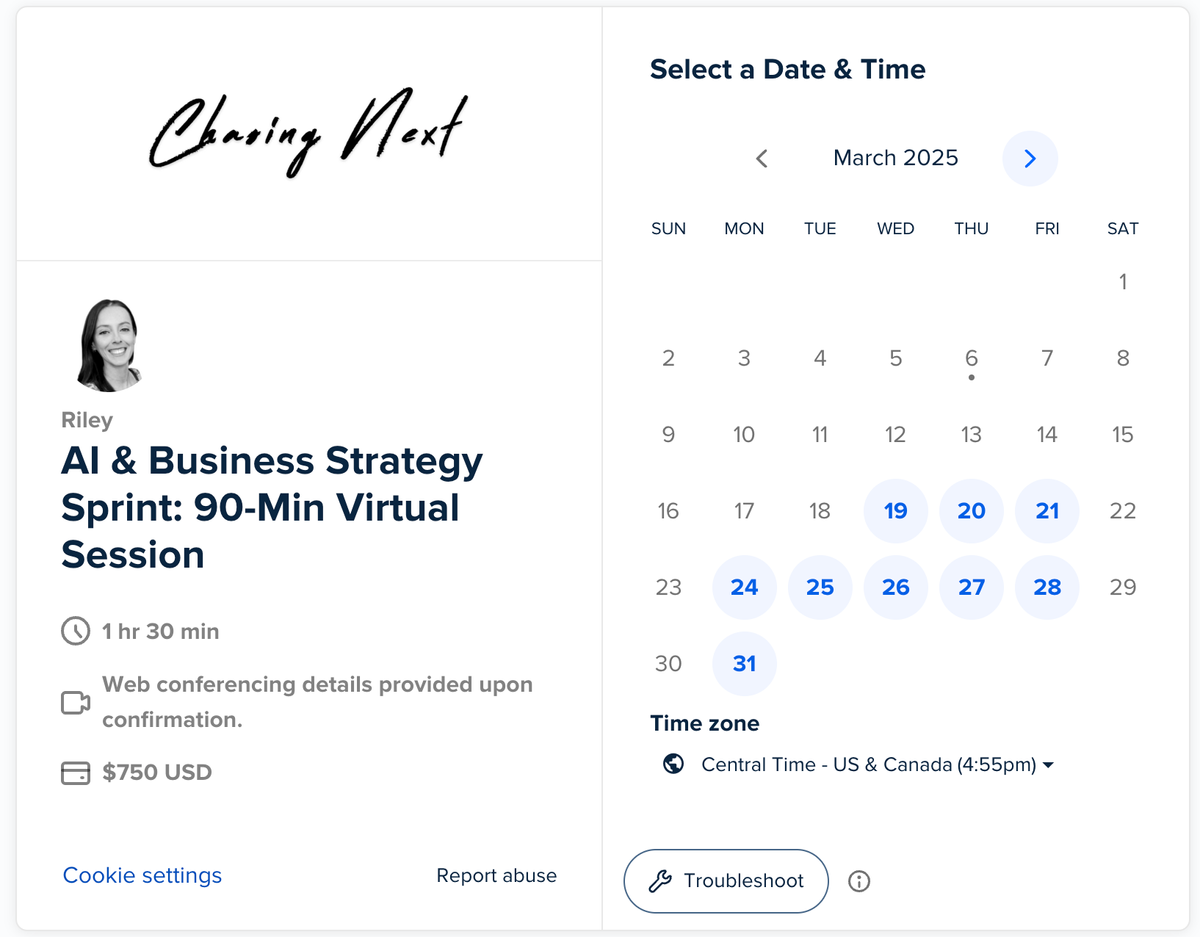
- Example structure:
- Headline: 60-Minute AI & Strategy Sprint
- Subhead: Clarify your automation priorities, map next steps.
- Brief bullet points about benefits and outcomes.
- Pricing and offer details.
- Clear CTA button: "Book Your Session"
Step 5: Automate Onboarding (Optional)
Let's make everything run as smoothly as possible. Automate steps so your customers receive clear communication and you're reducing manual work.
- Automate Client Communications in Calendly
- Create automated emails when the offer is booked, in the lead up to the service, and post-service.
- Immediate Confirmation: Automatic email confirming their purchase and outlining clear next steps.
- Pre-Meeting Reminders: Send automated reminders 24 hours and 1 hour before scheduled sessions.
- Post-Event Follow-Ups: Automated emails providing a recap, resources, or next steps after your session.
- Create automated emails when the offer is booked, in the lead up to the service, and post-service.
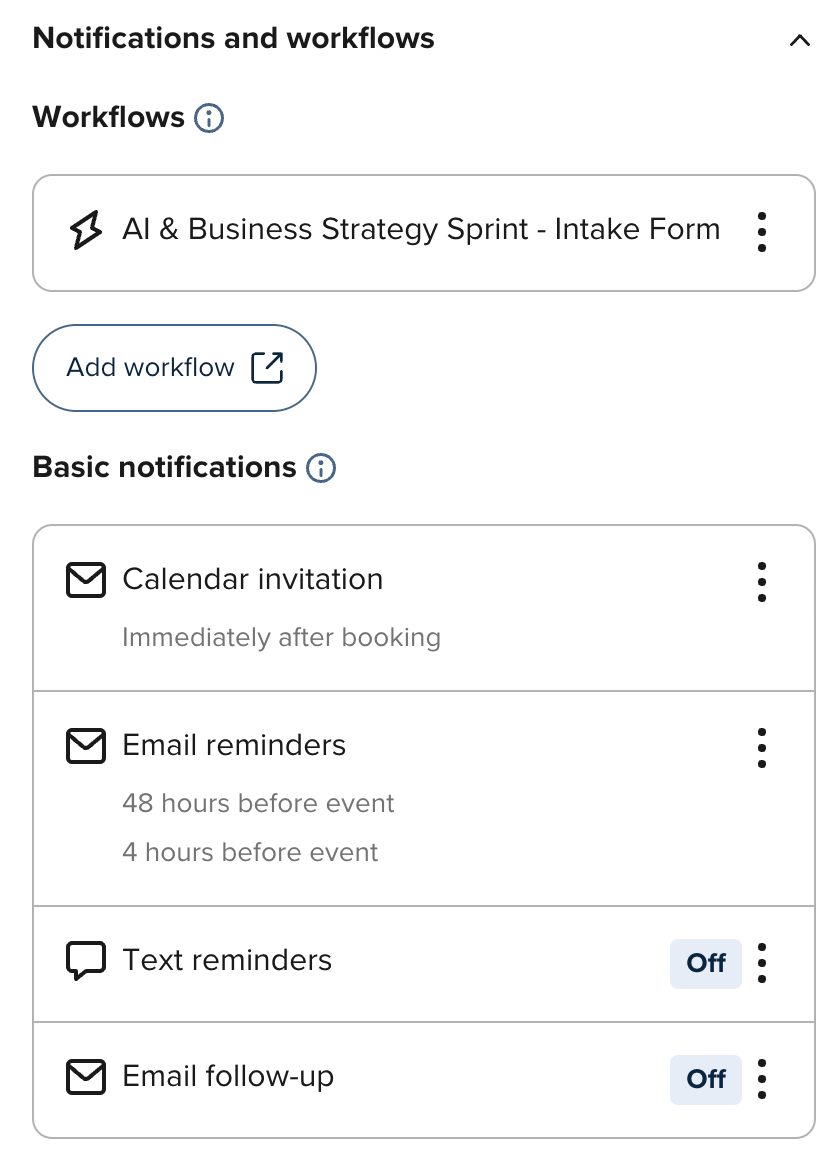
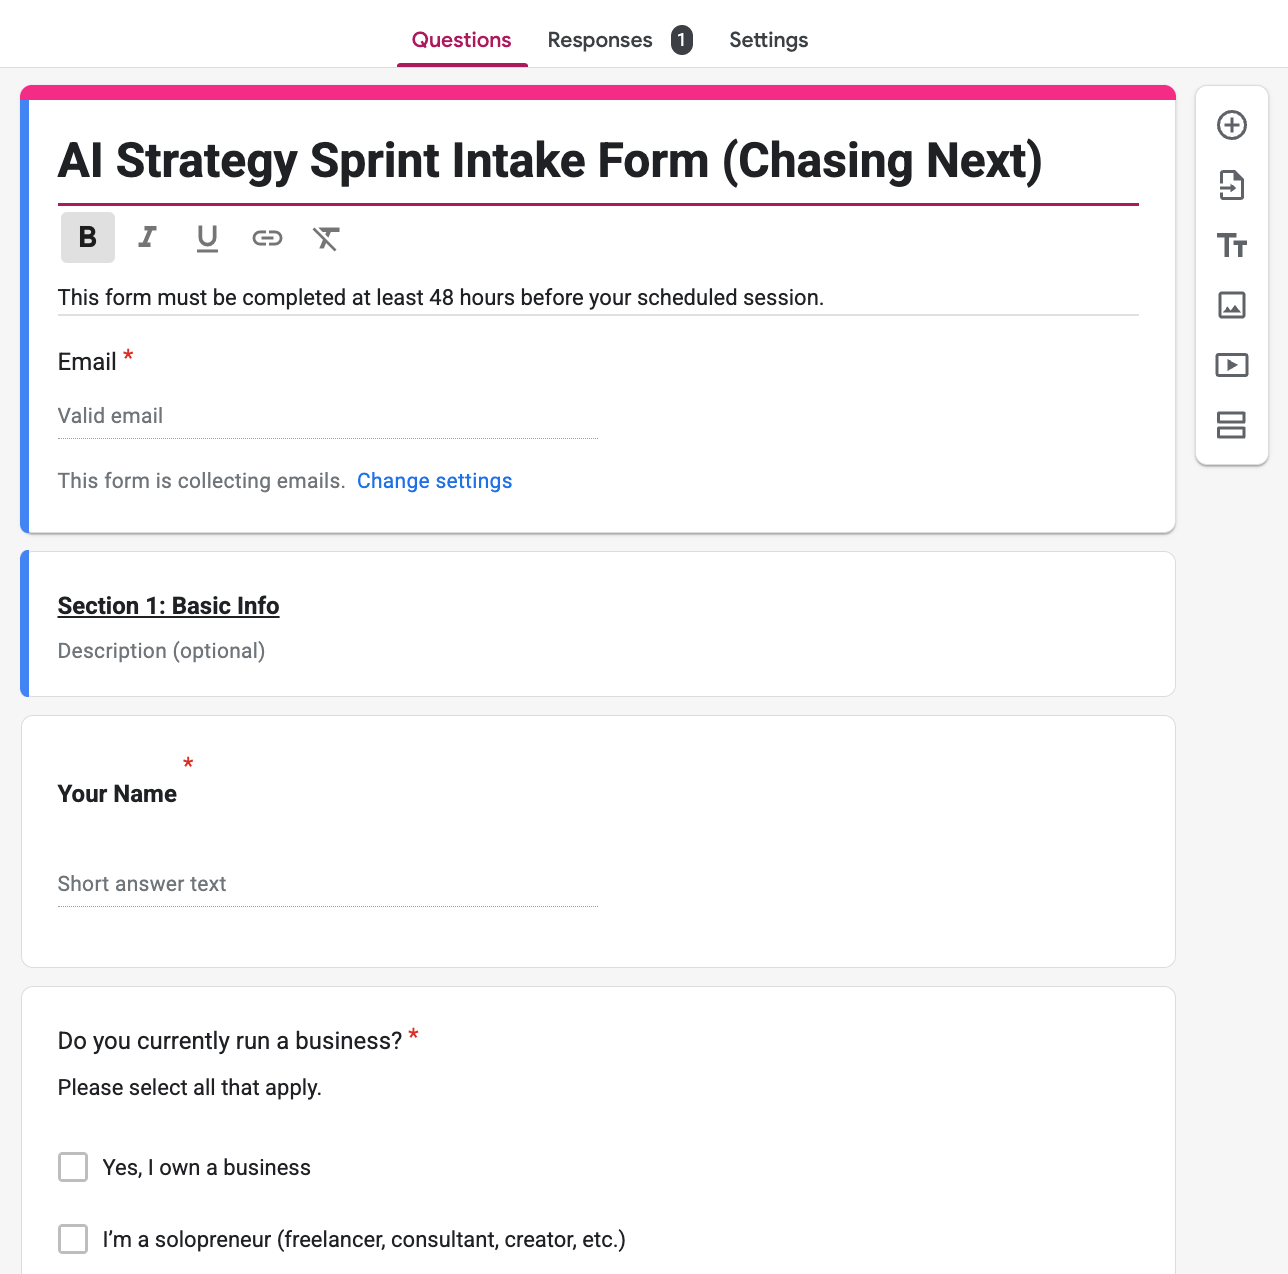
- Create a client intake form (if needed)
- If additional information about your client would be helpful, use a simple form to gather details.
- Create the interactive form in Google Forms or Typeform.
- Ask only critical questions that directly inform your ability to deliver value.
- Automatically send this form immediately after purchase through Calendly automated emails.
- If additional information about your client would be helpful, use a simple form to gather details.
Additional tools to consider: If you take up a love for automation, Make or Zapier are no-code tools that allow you to connect applications and further automate workflows.
Launch Quickly, Iterate Regularly
- Launch fast & start getting the word out:
- Don't get stuck making it perfect: get your offer live, gather feedback.
- Actively promote: share on social, reach out to your network, and test your messaging.
- Iterate based on feedback:
- Refine your pricing, positioning, and offer structure based on initial client responses.
- Stay adaptable: the first version won’t be the final one.
- Monitor results and optimize:
- Regularly review what's working, what's not.
- Refine your offer, messaging, and pricing based on real-world response.
An offer doesn’t need to be complicated. Define clearly, set up a simple sales page, integrate payments, automate onboarding, then launch and iterate.
You'll be surprised how quickly you can go from idea to selling.
See An Example: Check out my live offer page
DISCLAIMER: This content is for informational purposes only and does not constitute business, investment, legal, financial, or tax advice. Readers should conduct their own research and consult with professional advisors before making business decisions.